June 22, 2026
How to Photograph Clothing for Online Store: Full Guide
A practical, no-fluff guide to photographing clothing for your online store — gear, lighting, flat lay vs ghost mannequin, and editing — all on a small budget.
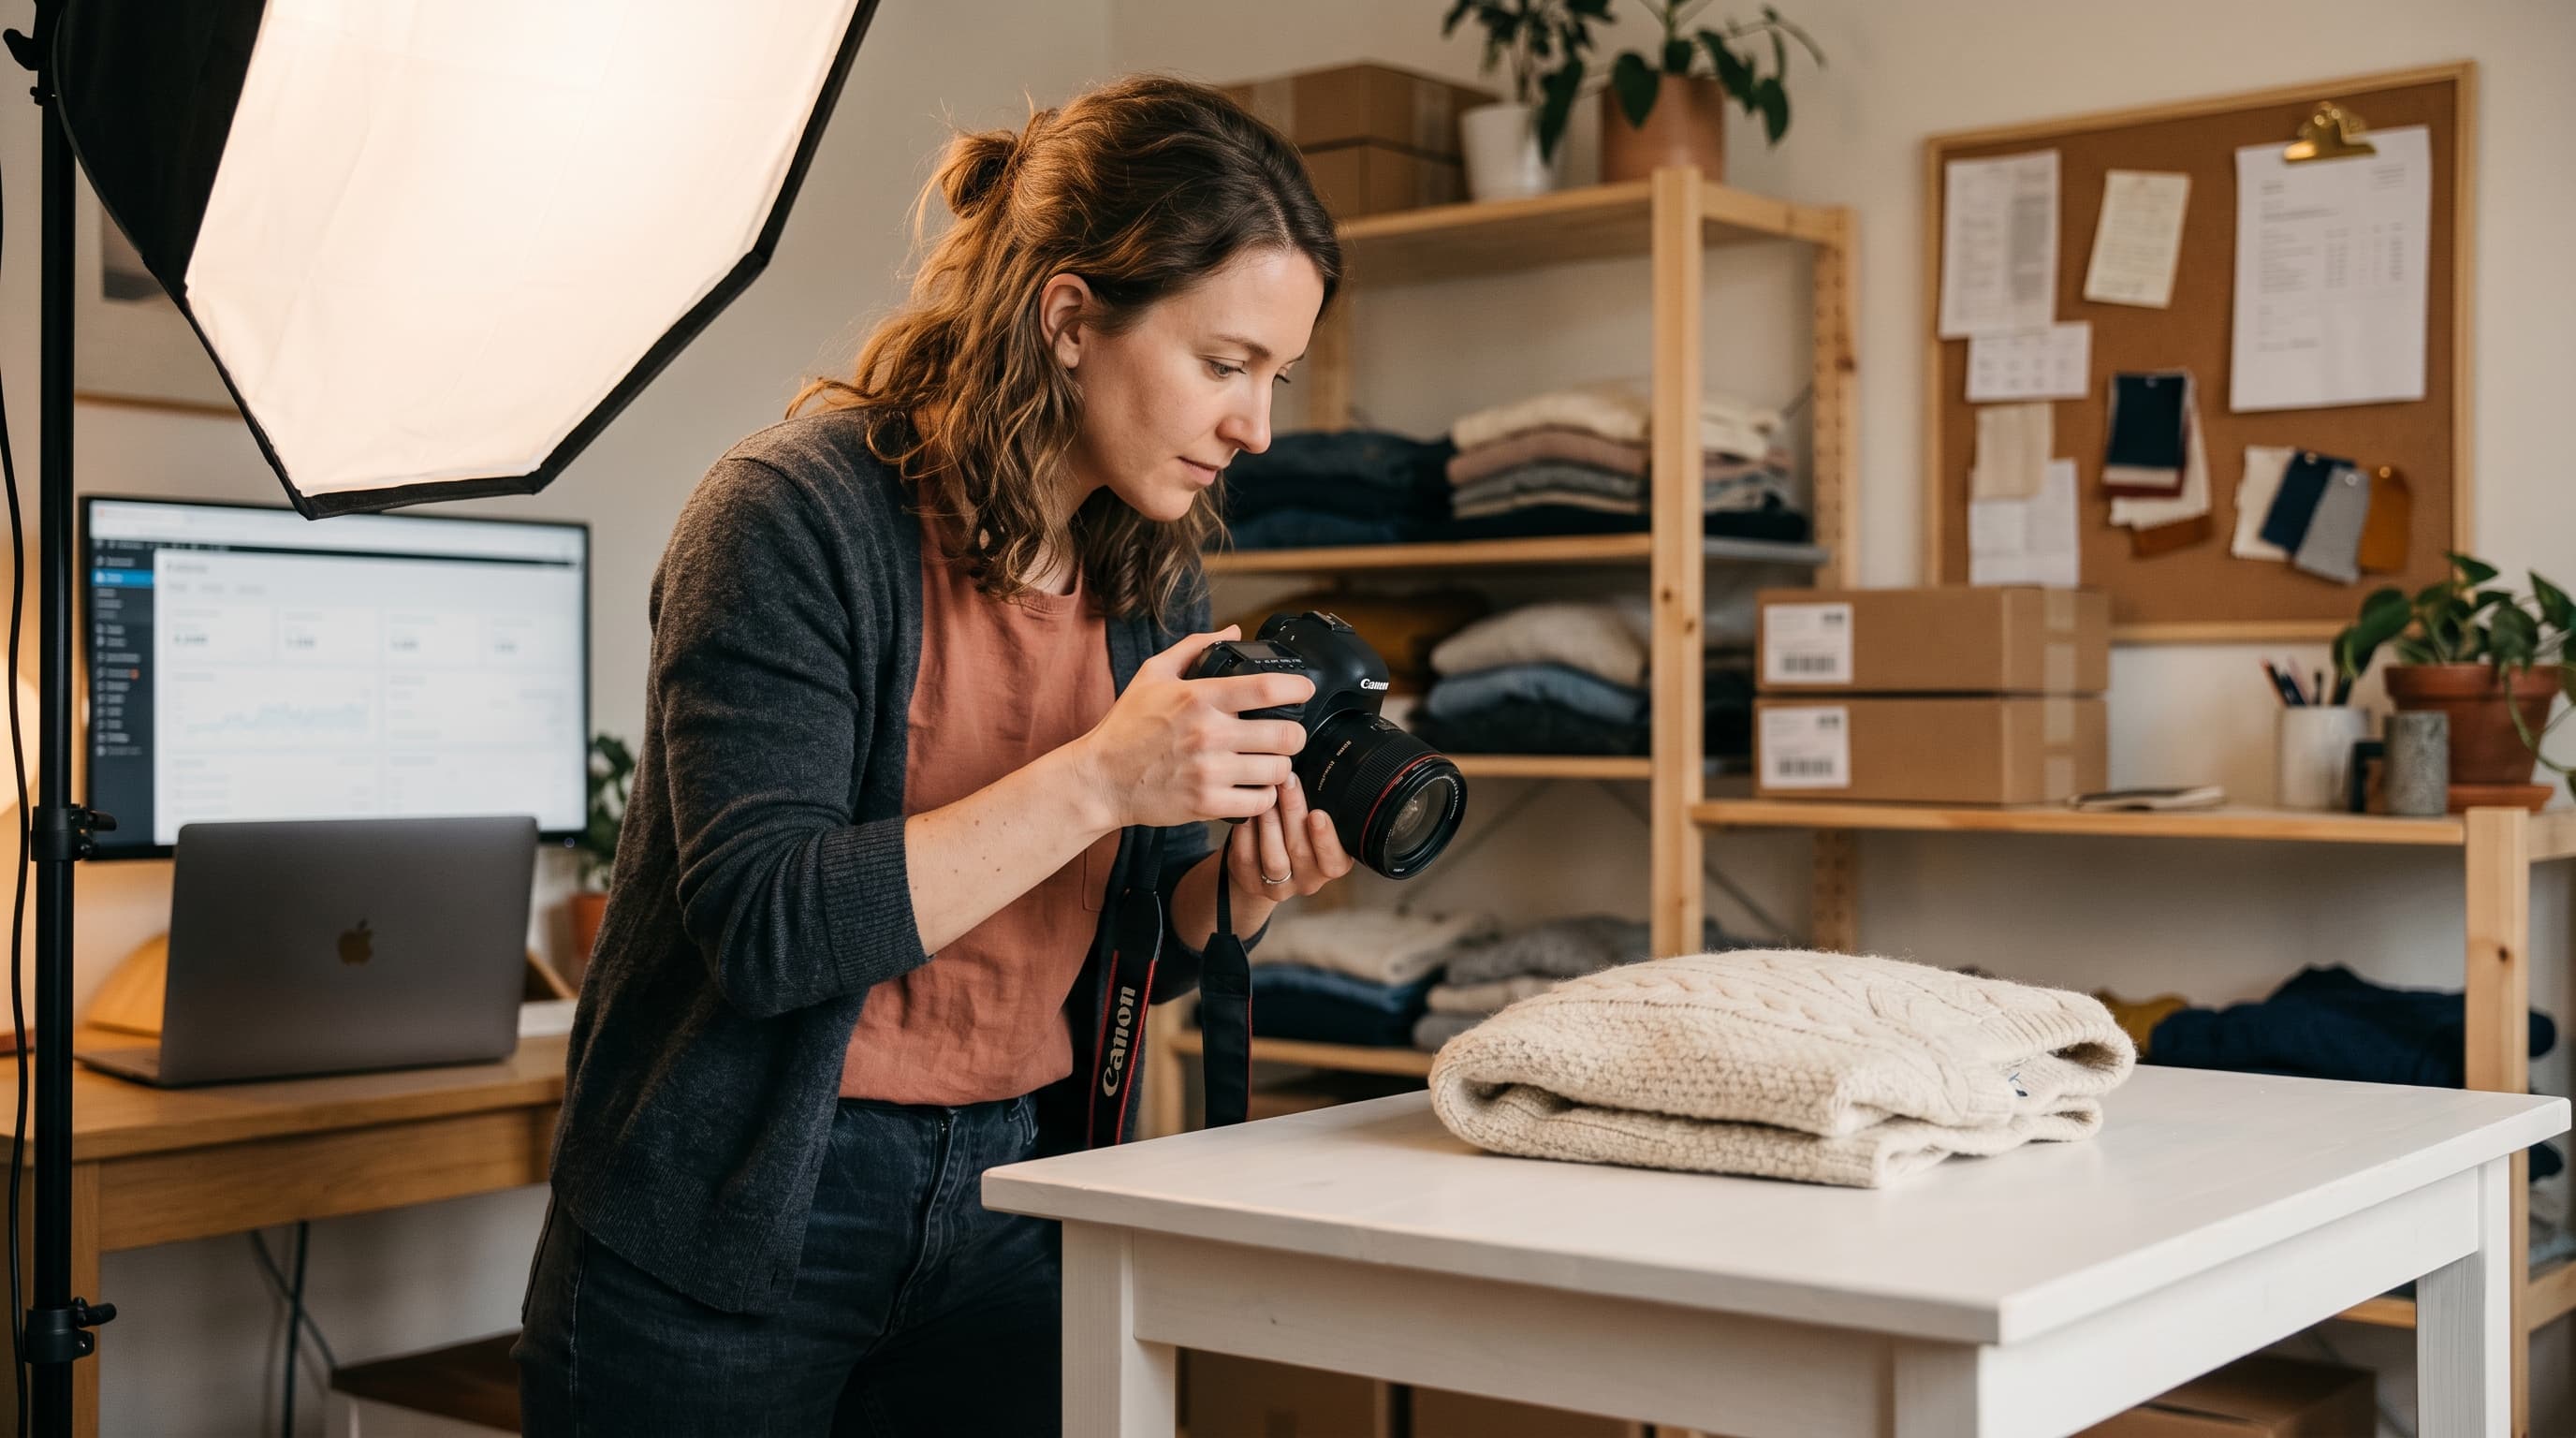
Good product photos sell clothes. Bad ones get returned, ignored, or scrolled past. If you're learning how to photograph clothing for online store listings, you don't need a studio or a $3,000 camera — you need consistent light, a clean background, and a repeatable process. This guide walks through every step, from setting up a corner of your apartment to deciding between flat lay and ghost mannequin shots, so the photos you publish actually convert browsers into buyers.

The stakes are higher than most new sellers think. Up to 88% of online apparel returns are tied to a mismatch between the photo and the real product. Clear, honest, well-lit images cut returns and build trust. Let's break down exactly how to get there.
What You Need for Clothing Product Photography
You can shoot professional-grade clothing product photography with gear most people already own. A modern smartphone with a clean lens beats a decade-old DSLR in untrained hands. Start simple, then upgrade only where you hit a wall.
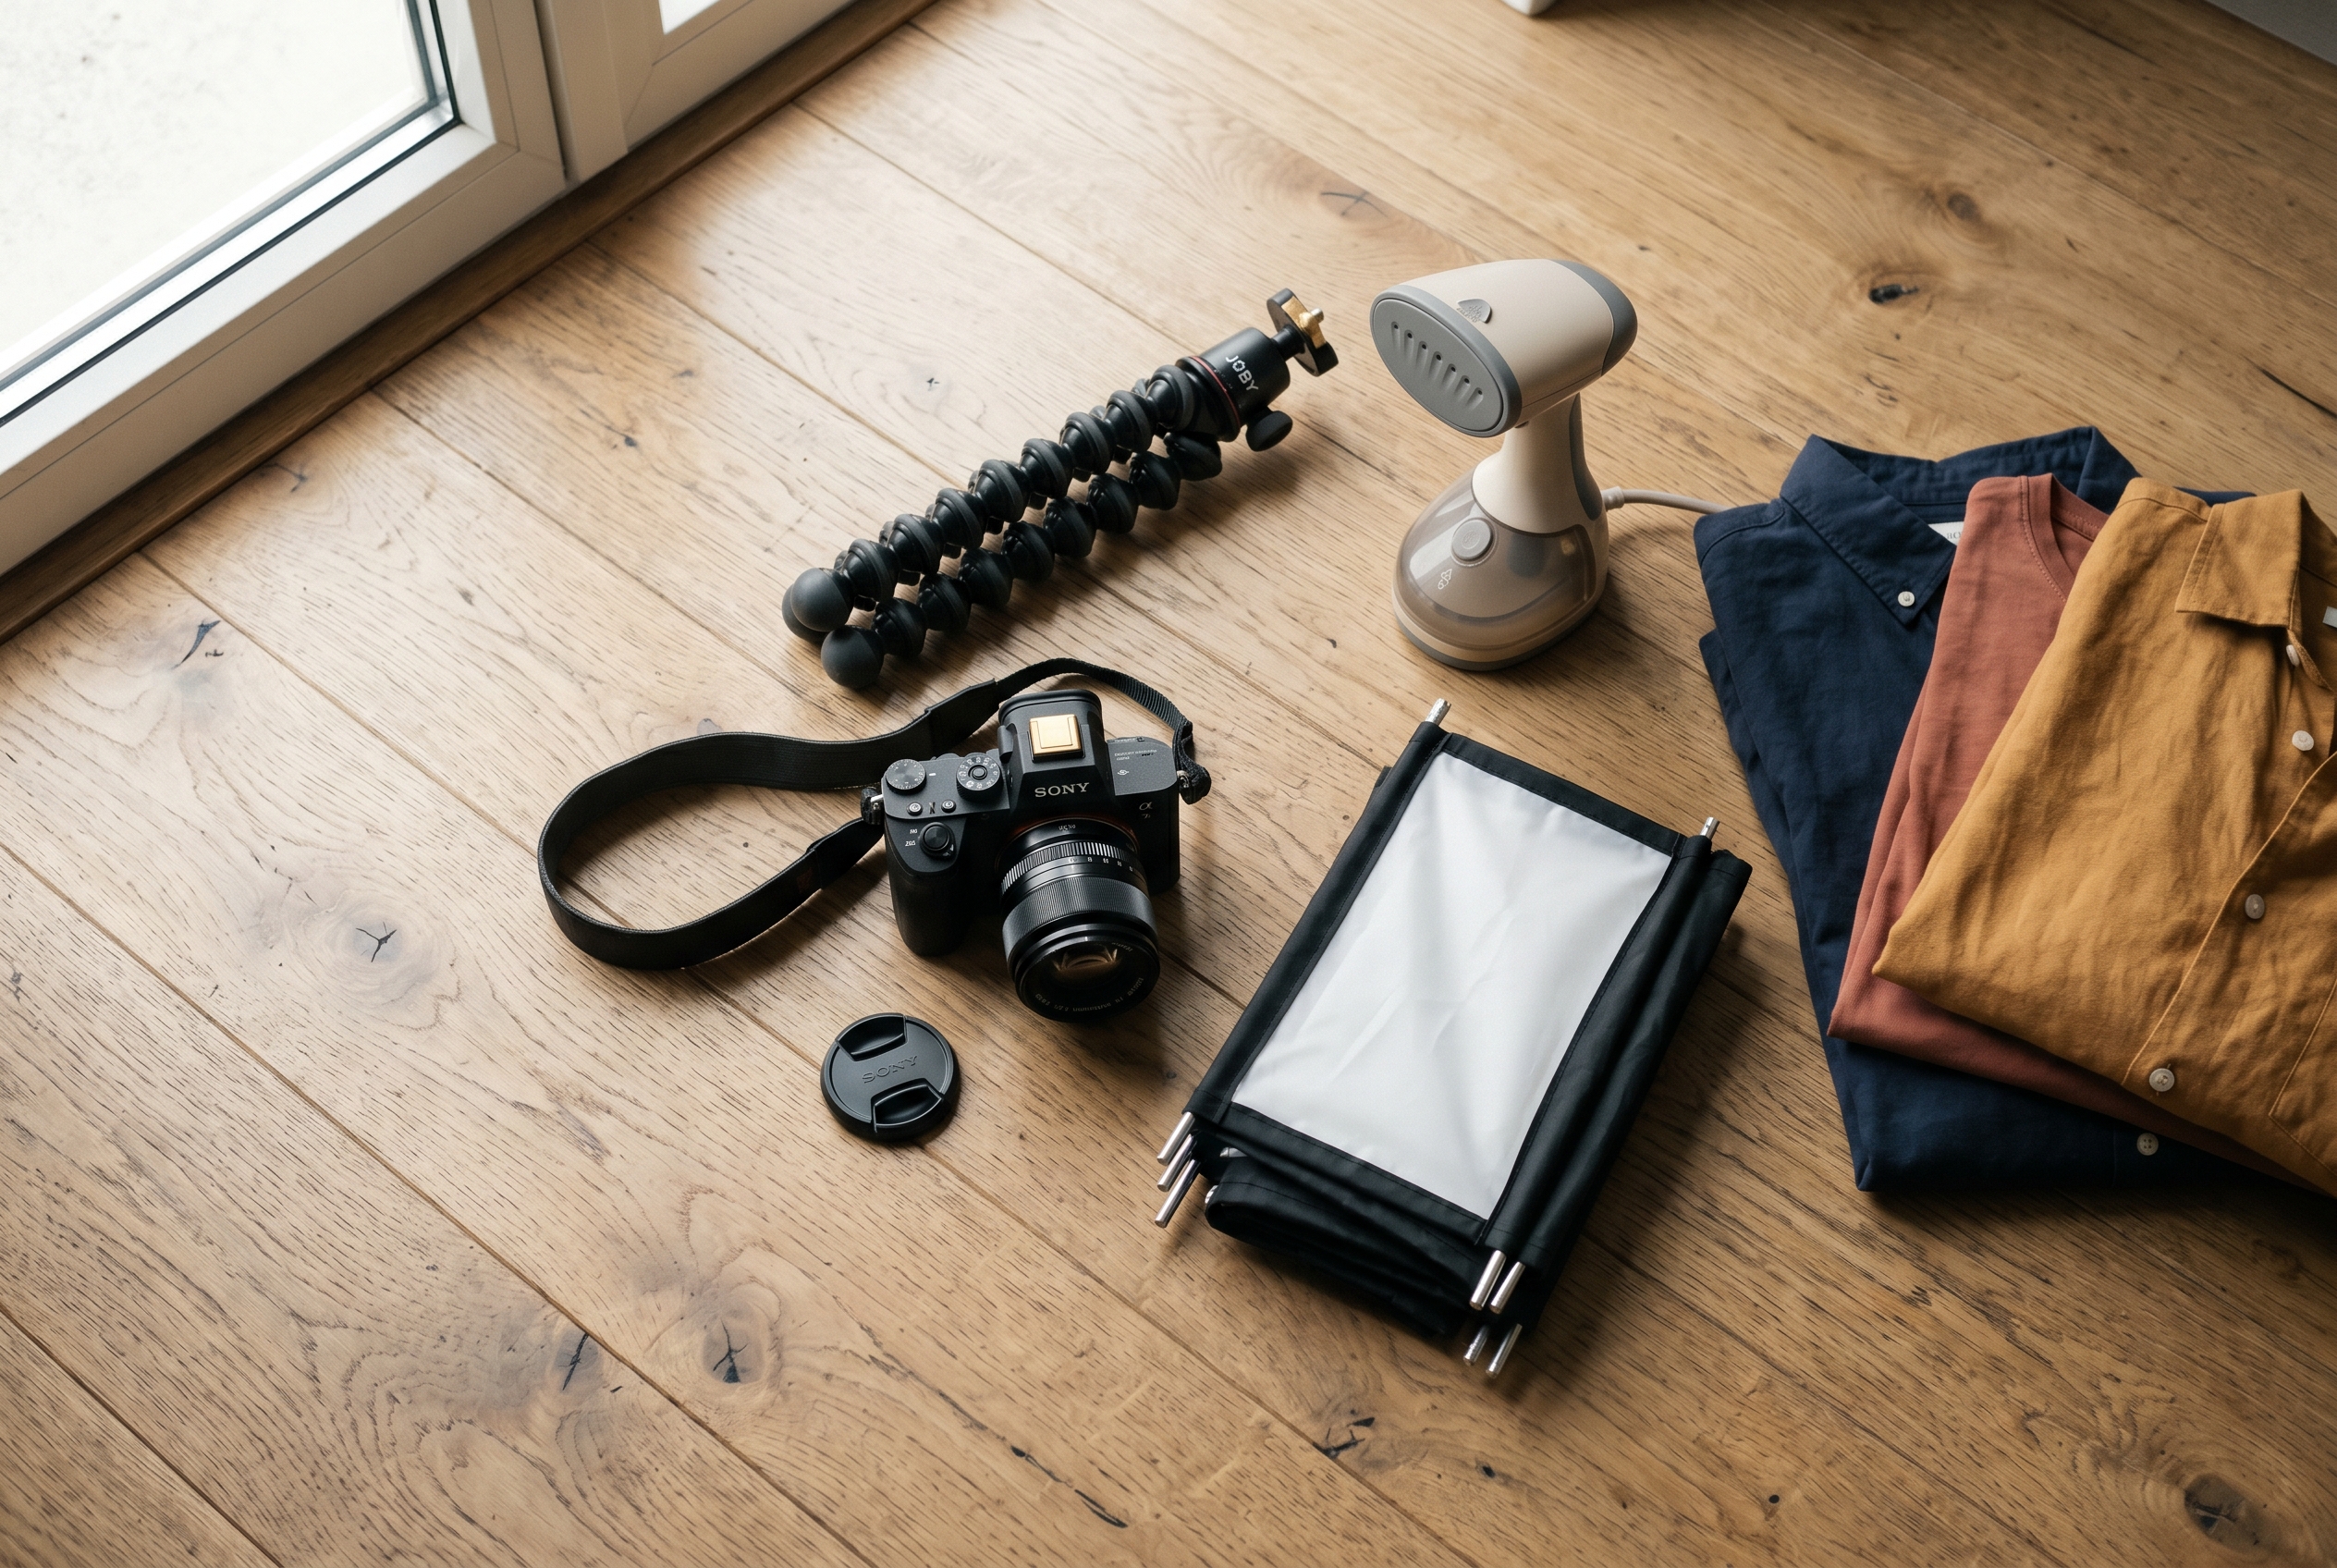
Here's the core kit for a DIY clothing photography setup that fits on a kitchen table:
- Camera: A smartphone from the last three years, or any entry-level mirrorless/DSLR. Shoot in the highest resolution available.
- Tripod: Non-negotiable for consistency. A $25 phone tripod keeps framing identical across hundreds of shots.
- Background: A roll of seamless white paper, a clean wall, or a foam board. White is the safest default for apparel.
- Light: Two softbox lights, or one big window. More on lighting below.
- Steamer: Wrinkles are the fastest way to make a product look cheap. A handheld steamer pays for itself.
- Clips and pins: To shape garments and hide loose fabric from the camera.
Total spend for a starter setup runs $100–$250 if you buy lights and a tripod. Compare that to a single agency photo shoot, which often costs $50–$150 per product. The math favors doing it yourself, especially while your catalog is still small.
Camera settings that matter
If you're on a phone, lock exposure and focus by tapping and holding the screen, and turn off the flash — built-in flash flattens texture and casts harsh shadows. On a dedicated camera, shoot at ISO 100–400 to keep noise low, an aperture around f/8 for sharp full-garment focus, and adjust shutter speed for brightness. Always shoot in RAW if your device supports it; it gives you far more room to fix color later.
How to Take Clothing Photos at Home With Good Lighting
Lighting is the single biggest factor in whether your photos look amateur or professional. Most beginners obsess over cameras when learning how to take clothing photos at home — but the camera matters far less than the light hitting the fabric.
You have two reliable options for apparel photography lighting:
- Natural window light. Free, soft, and flattering. Position the garment beside a large window during midday, with the light coming from the side. Avoid direct sunlight — it creates hard shadows and blows out color.
- Artificial softbox lighting. More consistent because it doesn't change with the weather or time of day. Use two softboxes at 45-degree angles on either side of the product to eliminate shadows and show true texture.
The goal is even, diffused light with no harsh shadows. A single bare bulb or your phone's flash will create dark patches that hide detail and distort color. If you only have one light source, bounce fill light back onto the shadow side with a white foam board.
Get the color right
Nothing drives returns faster than a customer receiving a "navy" jacket that's actually black. Set a custom white balance using a sheet of plain white paper, or shoot a gray card in your first frame so you can correct color in editing. Keep all your lights the same color temperature — mixing warm household bulbs with cool daylight bulbs ruins consistency. For deeper detail on accurate color, the guidance from Adobe on white balance is a solid reference.
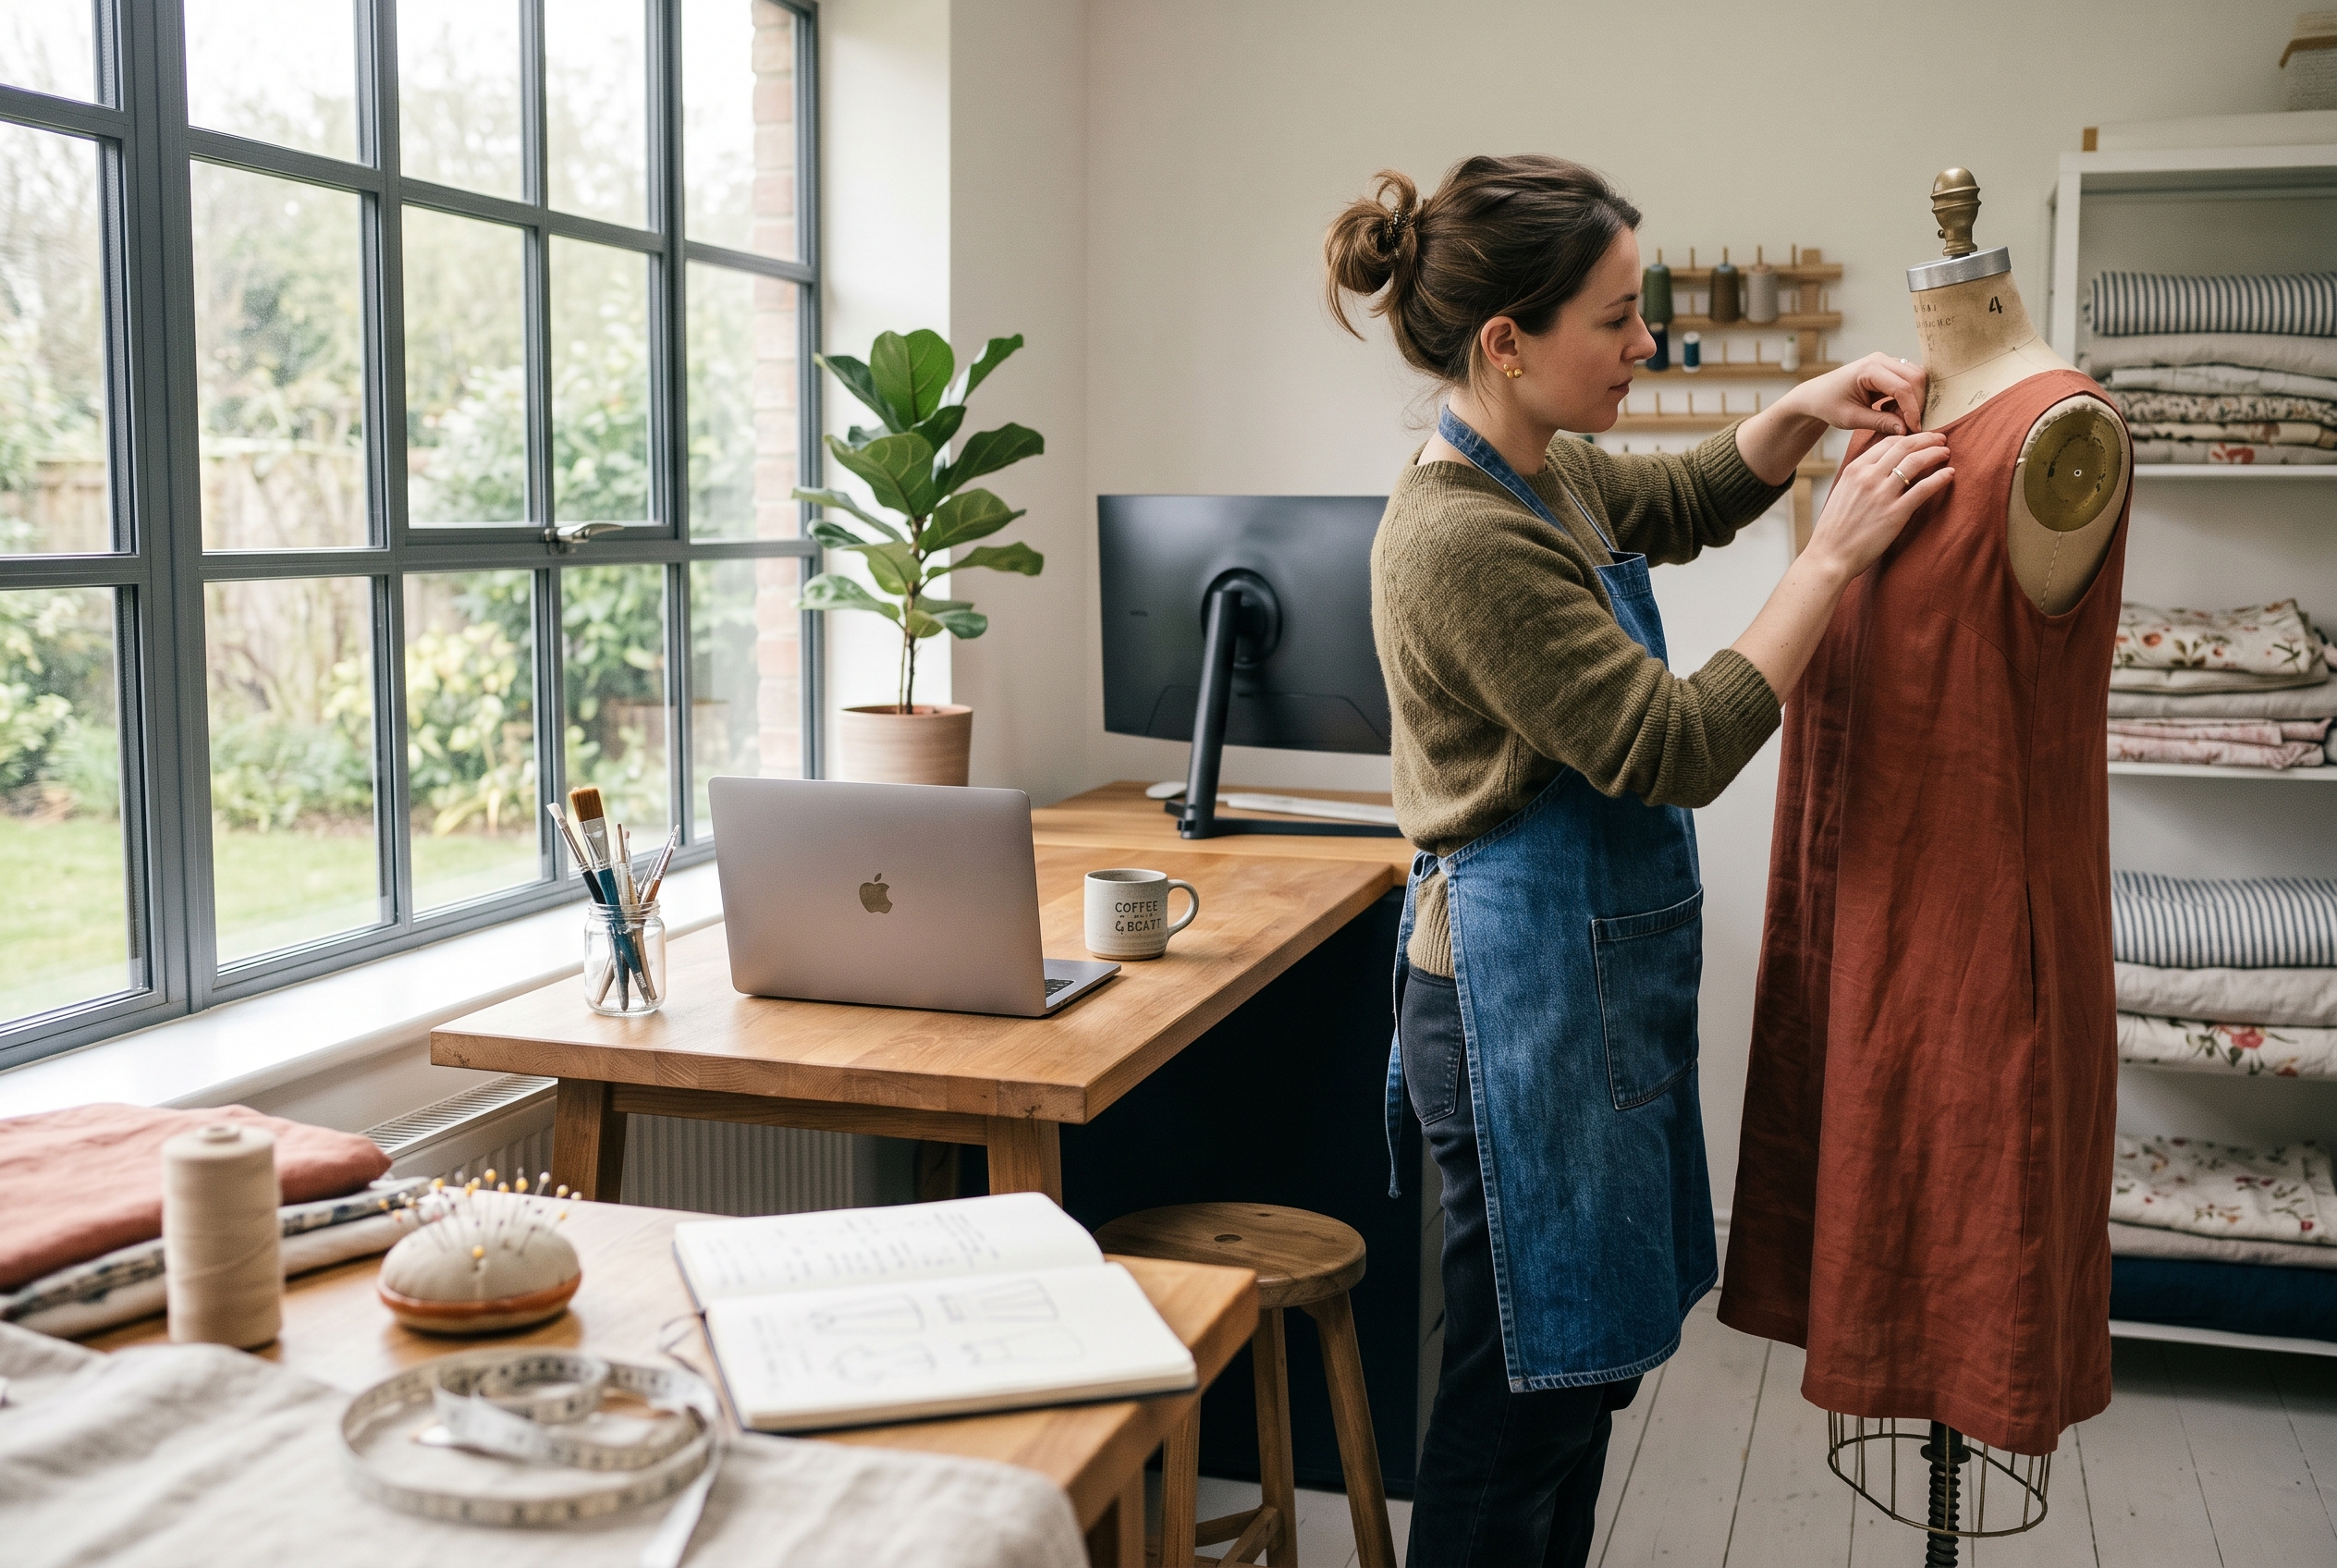
Flat Lay vs Ghost Mannequin: Which to Use
The biggest creative decision in clothing product photography is how you display the garment. The flat lay vs ghost mannequin debate isn't about which is "better" — each serves a different purpose, and many stores use both.
Flat lay means laying the garment flat on a surface and shooting straight down from above. It's fast, cheap, and great for accessories, folded basics, and styled outfit groupings. Ghost mannequin (also called invisible mannequin) shows the garment on a mannequin, then edits the mannequin out so the clothing appears to hold a 3D shape on its own. It shows fit and drape far better than a flat lay.
| Method | Best for | Cost & effort | Shows fit? |
|---|---|---|---|
| Flat lay | Accessories, basics, styled sets, social posts | Low — no mannequin needed | Poorly |
| Ghost mannequin | Structured garments, dresses, jackets | Medium — mannequin + editing | Very well |
| On-model | Premium brands, fit-critical items | High — model + location | Best |
A practical rule: use flat lay when budget and speed matter, ghost mannequin when fit and structure sell the item, and on-model shots for hero products where you want emotional connection. Most successful stores mix all three across a single product page.
How to shoot a clean flat lay
- Lay the garment on a wrinkle-free white background and steam it first.
- Shoot directly overhead — mount your phone on an overhead tripod arm or stand on a stable stool.
- Use a level (most phones have one built in) to keep the camera perfectly parallel to the surface.
- Style sleeves and collars naturally; pin folds underneath so they hold shape.
How to Photograph Clothes to Sell Online: The Shot List
Knowing how to photograph clothes to sell online isn't just about one perfect hero image. Shoppers can't touch the fabric, so you need to answer every question they'd ask in a physical store through multiple angles. A complete shot list per product builds confidence and slashes returns.
For every garment, capture at least these images:
- Front view — the main listing image, clean and centered.
- Back view — shoppers want to see the full garment.
- Side or 3/4 angle — shows shape and drape.
- Detail close-ups — fabric texture, stitching, buttons, zippers, logos.
- Scale or fit reference — on a model or mannequin so size reads clearly.
- Any flaws — if selling secondhand or vintage, photograph defects honestly.
Consistency across your catalog matters as much as quality. Use the same background, lighting, camera height, and crop for every product. When a shopper scrolls your collection page, a uniform look signals professionalism and keeps attention on the clothes rather than the inconsistencies.

Editing and file prep
Light editing makes a real difference. Crop tightly, straighten the garment, clean up stray threads or dust, correct white balance, and bump exposure slightly so the background reads true white. Free tools like GIMP or your phone's built-in editor handle most of this. Don't over-edit — saturated, over-smoothed photos misrepresent the product and trigger returns.
Before uploading, optimize your files so they don't slow your store down. Export at around 2000px on the long edge, compress to keep files under 200KB where possible, and use descriptive filenames like navy-linen-shirt-front.jpg. Page speed directly affects both conversions and search ranking — Google's image best practices are worth a read for getting your photos to rank in image search.
Putting It on Your Store the Right Way
Great photos are wasted if your store displays them poorly. Your product pages should support zoom, show multiple angles in a gallery, and load fast on mobile, where most apparel shopping now happens. Every image needs descriptive alt text — both for accessibility and because it helps your products show up in search.
This is where the platform you build on starts to matter. On some setups, fast image galleries, zoom, and proper alt text mean wrestling with plugins or theme code. A product photography for online clothing store workflow runs smoother when image handling, optimization, and responsive display come built in rather than bolted on. If you'd rather describe your store in plain words and have advanced product pages, fast load times, and SEO-ready images handled for you, that's exactly the kind of thing Rovela takes care of by default.
A few placement essentials for any platform:
- Lead with your strongest front-view shot as the main image.
- Order the gallery logically: front, back, side, details.
- Keep image dimensions consistent so the grid stays tidy.
- Write alt text that describes the garment, color, and key features.
- Test how everything looks on a phone before going live.
If you're weighing your options for where to sell, our guides on starting an online business cover the tradeoffs, and the pricing breakdown shows what's included without per-app fees.
Conclusion: Consistency Beats Perfection
You don't need a professional studio to photograph clothing well. You need diffused lighting, a clean white background, a tripod for consistency, and a clear shot list covering front, back, detail, and fit. Decide between flat lay vs ghost mannequin based on whether speed or fit matters most for each item, edit lightly to keep things honest, and optimize files so your store stays fast.
Master a repeatable home setup and you'll shoot an entire collection in an afternoon — and the photos will quietly do your selling for you. When you're ready to put those images in front of buyers, Rovela builds a complete online store from a simple conversation, with fast, search-ready product pages included so your clothing photography gets the showcase it deserves.
